 I cannot rave enough about James Morton’s book Brilliant Bread: it’s no frills, to the point, and incredibly serious about bread. I have posted my take on his sourdough bagels before, but in order to get into the swing of things with the Great British Bake Off I thought I’ll try out his baguette recipe for this week’s bread challenge.
James’ baguettes clearly fall into the bracket of ‘slow food’, and if there is a ‘very slow food’ category I’d probably end up putting them in there. So Dana, if you’re still looking for a ‘guilt-free’ bread recipe, you might like this: spending close to two days preparing these you are clearly offsetting the use of white flour and yeast! 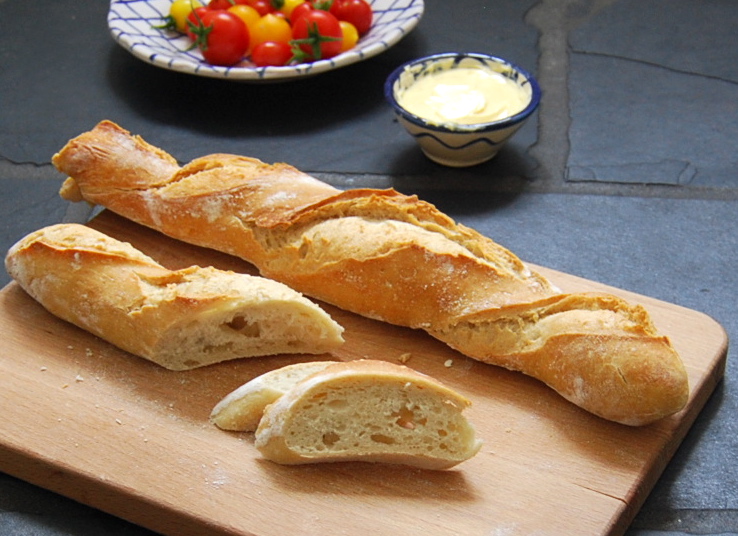
Talking about guilt and bread, I would like to repeat James’ points about what he terms the ‘health trend’ of a gluten-free diet: unless you are diagnosed with coeliac disease or a severe wheat allergy, he states, which affect less than 2% of the population, consuming gluten will not affect you. What might affect you, however, are the high number of additives in shop-bought breads, and the fact that these breads are often not fully baked to prevent them from going stale. Check out last week’s Guardian with its article on the health benefits of sourdough. But if you’re still feeling a bit sinful, experiment with wholewheat and rye flour, spelt and grains: what way you are upping your intake of fibre, which is always a good thing 😉
As for the timings, for the perfect baguettes you need to start at least a day, if not two, before you want to eat them. As today was an absolutely miserable day, heavy rain interspersed with thunderstorms and some more heavy rain, it really didn’t matter; in general, however, you have two options:
The slow way (if you have time during the day):
- Day 1: prepare the poolish (10 mins), to rest overnight
- Day 2: mix the dough (15 mins), rest (2-3 hours), shape (10 mins), rest (4 hours), bake (30-40 mins)
The even slower way (to fit around work):
- Day 1: prepare the poolish (10 mins), to rest overnight
- Day 2: before work, mix the dough (15 mins), rest while at work (8 hours), shape (10 mins), rest (1 hour), bake.
As you can see, most of the time you are doing nothing! Time to have that well-deserved cup of tea, or sleep, or go to work – whatever floats your boat.
For the less experienced bread-makers there is quite a lot of terminology involved to describe the different processes, so here’s a quick break-down of the terms involved:
Sourdough-English for Beginners
Poolish: a poolish refers to a mix of equal parts of water and flour with yeast, which is then ‘ripened’ (rested) before being used; it is thought to be of Polish origins, hence the name.
Ripening: while you are resting (cuppa tea, work, sleep, watching TV, you name it), the active yeast is working away in the flour and water mix, turning it slowly into a proper dough.
Sourdough starter: here you have several options: the French levain uses white flour and yeast, which is needed for this recipe (see my sourdough starter, which takes a whole week to prepare but will last you for years!); ‘German’ sourdough starters, on the other hand, are made of rye flour and water, with no added yeast. That is, the yeast adds itself, over time, as the mix is ripening. Both types of starters will last you for years: every time you want to bake with it you ‘feed’ it with flour and water and let it ‘ripen’; you then take the amount you need and keep the rest for the next time.
Proving: this is just another fancy term for leaving the stuff to its own devices, either in a warm place or in the fridge, always covered with clingfilm or a damp towel. You can prolong the proving by popping the dough into the fridge, e.g. if the recipe states 2 hours in a warm place but you have already lost interest: pop it into the fridge and finish it off the next morning. This has the additional benefit that a longer proving time will result in a stronger sourdough flavour!
Scoring: the art of cutting your bread to allow it to rise, as well as to give it a pretty pattern. Use a serrated knife and cut sideways, creating a little flap, to allow the bread to rise.
All that time and the vocabulary – is it really worth it? Absolutely! If you’ve never used sourdough before, do give it a try: it adds another dimension to your breads, both in terms of taste and textures. If the baguettes seem a step too far, try my easy sourdough bread, which only takes a couple of hours, before moving on to the more hard-core baguettes. A word of warning, though: sourdough is highly addictive and you might end up baking sourdough breads on a regular basis …
You can freeze the baguettes, half-baked or fully baked, or store the half-baked ones in an airtight container for that freshly-baked feeling a couple of nights later!
The finished product – look at the lovely texture! And the flavour …
Baguettes (after James Morton) (makes 4 small baguettes)
For the poolish:
- 100g plain white flour
- 100g cold water
- 2 tsp fast-action yeast
For the dough:
- 300g plain white flour
- 200g strong white flour
- 10g salt
- 200g sourdough starter (levain)
- the poolish
- 250ml lukewarm water
- some flour or semolina, for dusting
The day before, you simply mix the ingredients for the poolish, cover it with clingfilm and leave it in peace.
The poolish, ready to rest
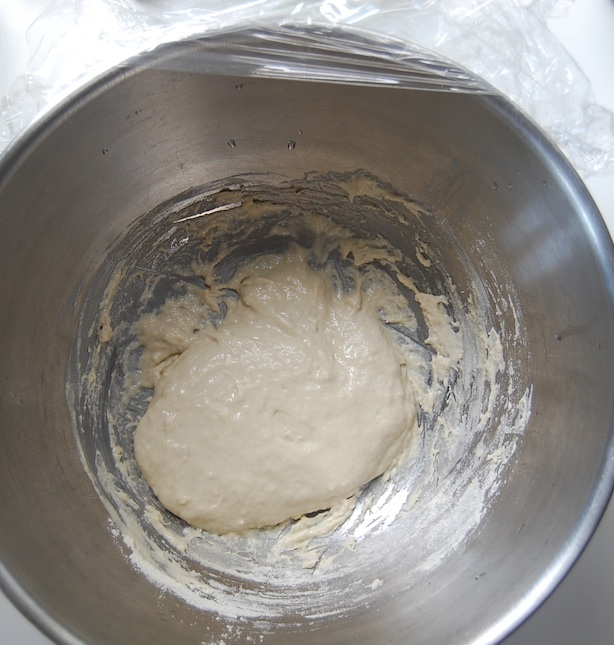
The next day, you will find that your poolish has ripened and changed considerably: the little bubbles on the surface show you that the yeast is active:

The poolish after ripening overnight
Mix in all the other ingredients to form a fairly wet dough: don’t feel tempted to add flour, just go with the flow by pulling the dough into all directions and folding it over; as time goes on you will notice a gradual change in that the dough becomes firmer and holds its form more easily:
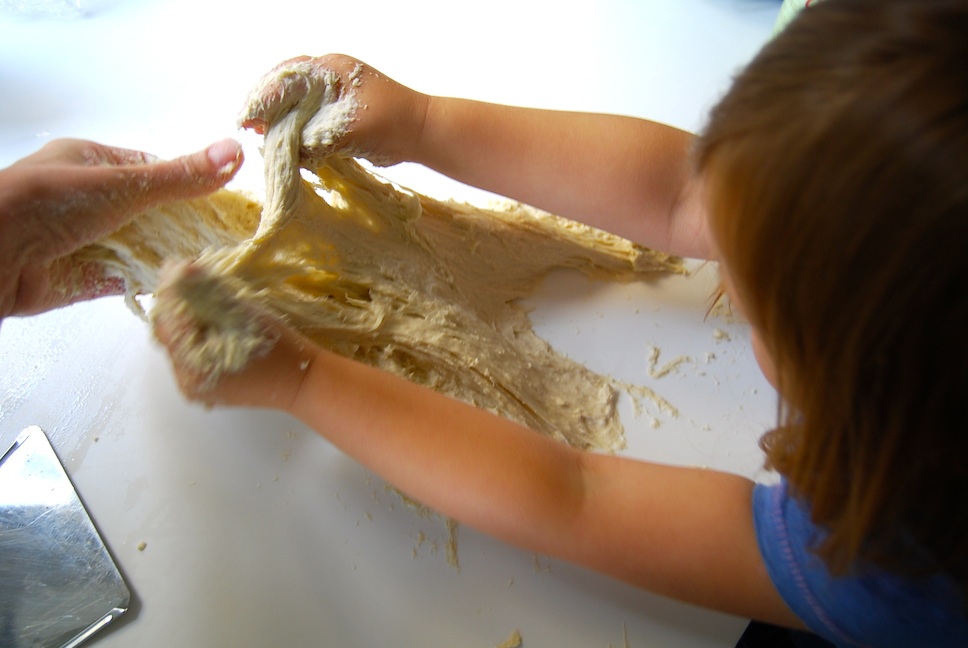
If handling a very wet dough is not your thing, enlist the help of an expert who knows all about working with sand, water, or mud……
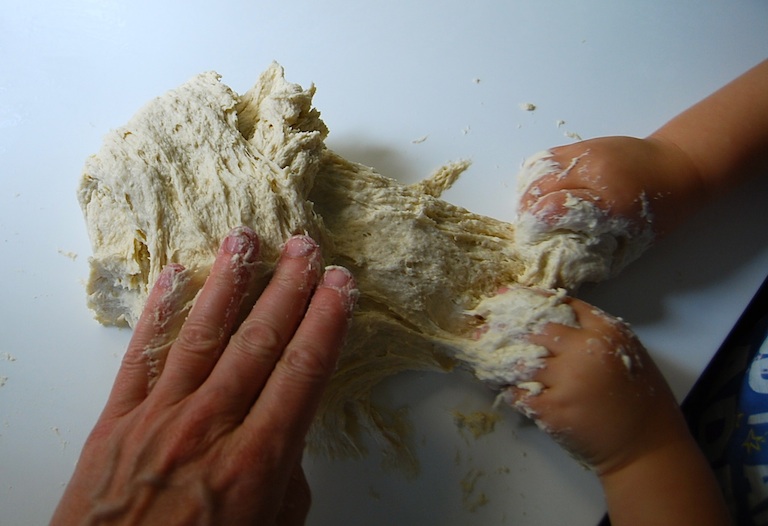
… who will be able to show you how to do the pulling and folding over
Keep at it for 10-15 minutes, thinking of a painful experience or an annoying colleague while you lay into the dough.
Once you’re happy shape it into a ball and return it to the bowl.
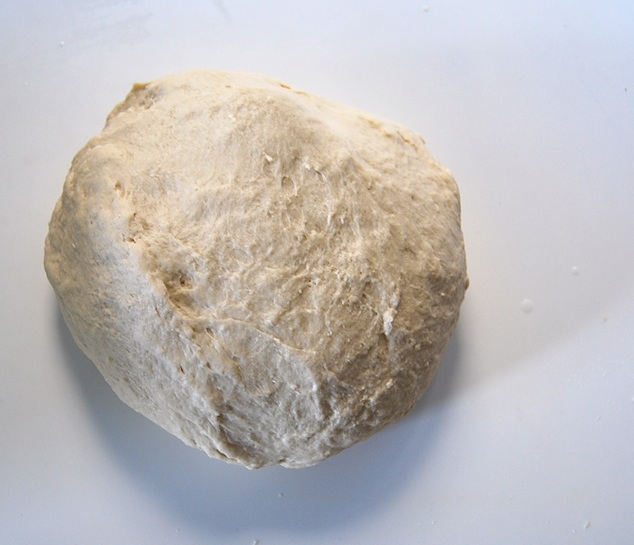
Gradually the dough begins to hold its shape and lets you form it into a ball
Cover it and either prove it for 2-3 hours in a warmish place (I use the cold oven to protect the dough from drafts) or, if you’re going for the even slower option, pop it into the fridge for up to 12 hours.
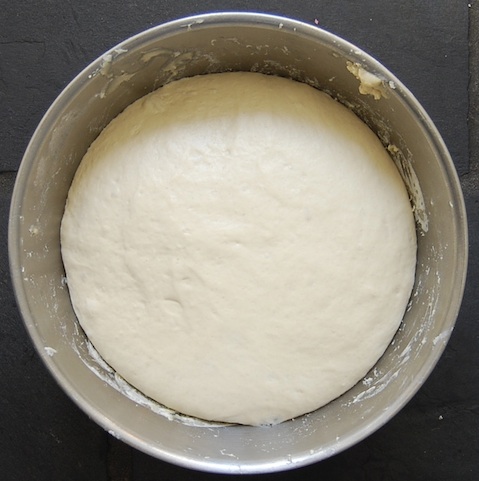
And again, a considerably bigger dough after the proving period
When you’re ready, take out your (grown) dough and cut it into 3 or 4 equal pieces: it really depends on how you want to fit them into the oven or fridge! Roll the baguettes into shape to the required length (think of the size of your oven trays, the fridge, the oven …) rather than the thickness, as the latter will change as they prove and bake.
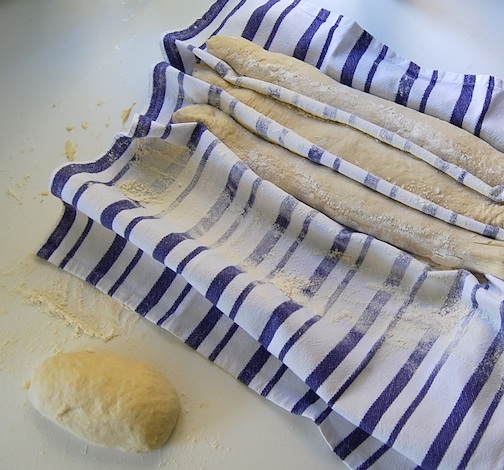
Rolling the baguettes and keeping them in shape
Place a tea towel on your baking tray and dust it generously with flour; transfer the baguettes onto it and fold it to create moulds for the bread rolls, separating them as well creating some support. Cover with another tea towel and prove either for 4 hours in the fridge (the slow way) or for 1-1 1/2 hours in a warm place (if you have already proved it in the fridge the first time, doing it the ‘even slower’ way).

A glance into our fridge: the round glass bowl on top of the egg cartons contains my sourdough starter
At least half an hour before you bake you will need to fire up your oven to 240C, including the baking stone or baking trays you are going to use. Put a flat ovenproof dish filled with water on the bottom of the oven: the humidity will give your breads a lovely crust, especially if you throw a couple of ice cubes on them when you slide in your breads! I prefer that to throwing half a cup of water into the oven: anyone who wears glasses will understand…
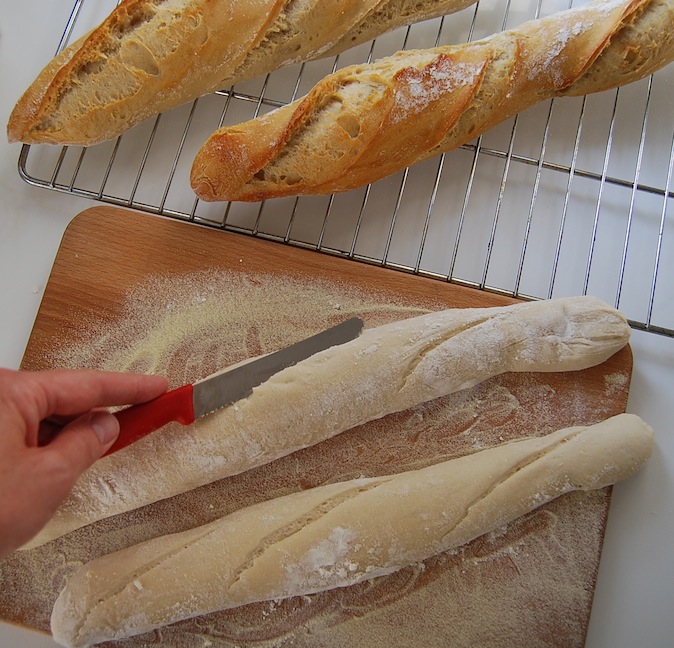
Scoring the second batch
Once your baguettes are ready to go, carefully turn them out onto a board which you have dusted with a little semolina or flour; ideally you do two at a time, unless your oven, stones or trays are big enough to accommodate more in one go. Return the rest of the baguettes to the fridge and score the ones you are going to bake as described above, clean sideward cuts along the length of the bread, before sliding them onto the hot stones or trays in the oven (ice cubes anyone?). Close the door and turn the heat down to 210C. Bake them for 30-40 minutes.
Now, if you want to only pre-bake some of the baguettes, remove them after around 15-20 minutes, before they are beginning to form a crust. You can freeze them or keep them for a couple of days in an airtight container: before you want to eat them, simply bake them at the required temperature until ready.
Although it had been raining heavily all day, at this point in the process the sun came out and we were treated to these lovely rainbows:
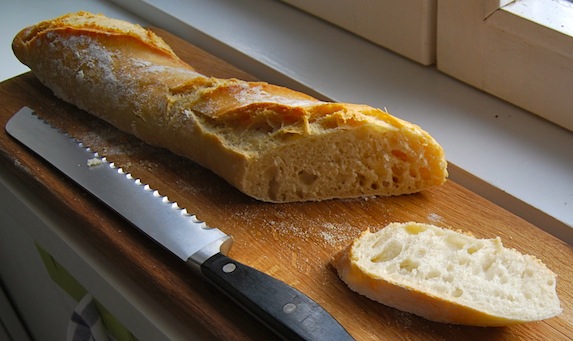
I left the first baguette to cool down on the windowsill: with the evening sun shining I could not resist taking this last picture before the hordes demanded their fair share: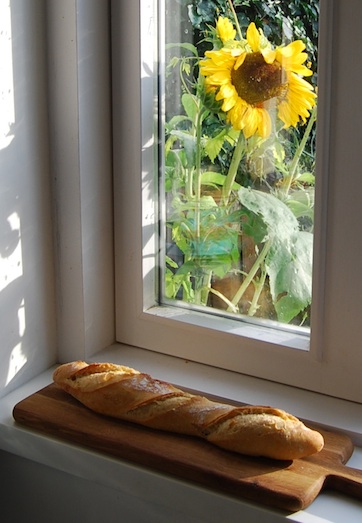
I hope you can smell it …


I sure can smell it! And what beautiful rainbows. 🙂
LikeLike
Thanks – no rainbows today, though, just rain 😦
LikeLike
Rain here too 😦 But I’m sure we’ll see the sun one of these days!
LikeLike
Yeppp, I can smell the fresh, sweet aroma of your beautiful baguette. I never knew the term poolish, what an informative post! I’ve always wanted to make this but was too scared… Need to try it out soon. 🙂 your baguette looks amazing something out of a boulangerie. I love rainbows, what a beautiful pic. 🙂
LikeLike
Give it a try – they are amazing!
LikeLike
I wish there was a “love” button and not just “like”! I bake sourdough bread all the time but have never tackled baguettes, I think I was worried about how they’d hold their shape and never really believed that the tea towel thing would work. It clearly does….well done and a great tutorial, thank you!
LikeLiked by 1 person
The tradition of baking bread in my country is great, that’s true, I bake my own bread too, my sister does it, my mom makes us to do it for her any time we are at home 😀 I’ve never tried the baquettes though and will do it this time as it’s a great recipe. They look delicious!
LikeLiked by 2 people
Oh!! Very nice!!
I promise I will get back to you with the properties of what I consider a guilt-free bread, so you can create a recipe and I can duplicate it 🙂
LikeLiked by 1 person
Those are very beautiful looking baguettes Ginger! Everything is well explained too. And what photos! I especially like the “action shots” and the last 2 pictures. My sunflowers are not nearly as big as the one at your window.
I must say I’m still working on “My Writing Process Tour” and look forward to posting it. Unfortunately, I haven’t had much opportunity to work on my blog lately. But I’m getting there!
LikeLike
Good to see you here! Our sunflowers are amazing this year, it was just the right mix of rain and sunshine I suppose. Hope to see a new post of yours soon!
LikeLike
Wow looks Yummy.. Was thinking to browse this recipe and you posted
LikeLike
Give it a go – it’s amazingly simple and rewarding!
LikeLike
Ginger, your baguettes are absolutely amazing. I can only imagine how your house smell 🙂
LikeLike
You loaves look absolutely beautiful!
LikeLike
Thank you! They tasted absolutely delicius, too 🙂
LikeLike
How beautiful. The crumb on that baguette looks amazing! I’m definitely going to give this a go – and I make a Danish Dark Rye bread that takes a week, slow bread is the best!
LikeLike
Thanks – I’ll have to check out your Danish rye as I am planning to make some rye breads – perfect for the autumn rains 😦
LikeLike
Pingback: Leckere Baguettes: Sauerteig für Anfänger | Ginger&Bread
I love bread but have never tried making baguettes but this recipe looks very interesting! 🙂
LikeLike
Pingback: Wholewheat, Rye and Oat Bread | Ginger&Bread